Friday, July 11, 2014

Food Friday: Casual Cream Cheese Cookies with Lemon Buttercream Frosting

Growing up, we loved to bake with our mom!  She taught us that baking solved everything. If your hungry, bake some cookies. If your sad, bake some cookies. If your happy, bake some cookies. Besides the classic Nestle Toll House or Nestlay tool hoouse (if you are a fan of Friends, you should get this joke!) chocolate chip cookies these Casual Cream Cheese cookies were a favorite. They are super easy, fun to make with kiddos and great with or without the frosting.


Casual Cream Cheese Cookies
Best Kids Cookie Cookbook 
By: Sunset

Ingredients
1 cup butter, at room temperature
3/4 cup sugar
3 ounces cream cheese, at room temperature
1 egg
1/2 teaspoon vanilla
2 cups all-purpose flour

Preheat oven to 325 degrees.

Mix butter, sugar, cream cheese, egg, and vanilla until smooth. Slowly add flour and beat until well blended.

Drop dough by rounded tablespoons onto ungreased baking sheets, spacing cookies about 1 inch apart. Bake for about 20 minutes, or until edges of cookies are lightly browned. (I had to bake mine for quite a bit longer. Next time I might preheat my oven to 350.)  Let cookies cool on baking sheets for about 5 minutes before transferring cookies to racks.

Makes about 36 cookies.


Lemon Buttercream Frosting
Betty Crocker Cookbook: Everything You Need to Know to Cook Today 
By: Betty Crocker

Ingredients:
3 cups powdered sugar
1/3 cup butter, at room temperature
2 to 3 tablespoons fresh squeezed lemon juice
1/2 teaspoon lemon zest

In a medium bowl, mix powdered sugar and butter with a spoon or electric mixer on low speed. Stir in 1 tablespoon of the lemon juice. Gradually beat in enough lemon juice to make frosting smooth and spreadable.


Once the cookies cool, spread the frosting on top and enjoy these buttery little treats!

Thursday, May 22, 2014

House Tour // The Living Room

It took a while but I am finally sharing photos of our living room! 

A few months ago we put in hardwood floors and it made such a difference! We hung some art, I made some pillows, we bought some rugs and added a split-leaf tree (It's amazing how much indoor plants bring to your house!) and it's almost done! We still have finishing touches, like paint touch ups, hanging more art and adding molding to some spots in the floor, but overall this room is done. 

We are so happy with how it turned out!


The view from the front door. Photo bombed by Frankie, our monster of a cat. 

To the left is part of the kitchen/dining nook.

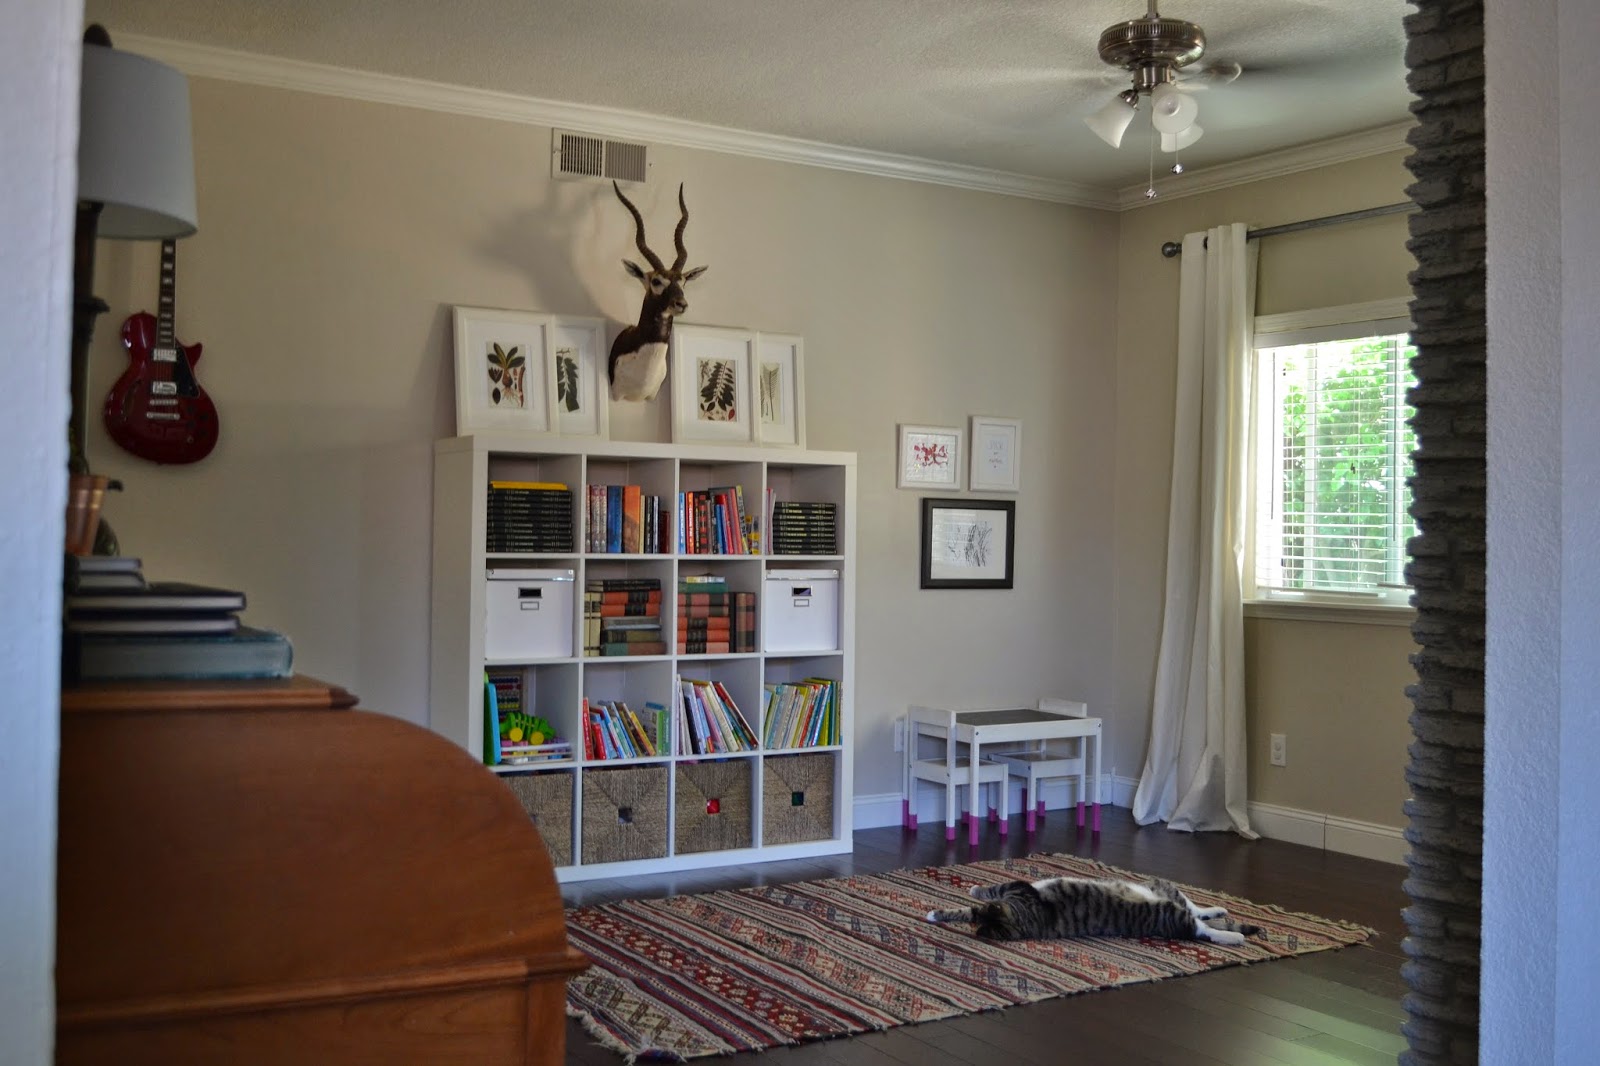
This area is where we store all Raegan's toys and books. It has turned into her playroom. 

Frankie and Sadie love our new rugs. 


And here are a couple before photos when we had carpet. 


Next up, we're going to be working on Raegan's big girl room and baby girl's nursery! 

Wednesday, May 14, 2014

Our Backyard Makeover!

A couple weeks ago I shared a couple photos of our backyard during our big makeover and I’m so excited to say that it’s mostly done now! 

Here it is now!


The view from our back door.

This was once the "clump" 
There are still a few things left to do — stain the adarondack chairs, paint the fence, build a built-in area for the barbecue, plant some more plants ... — but for now it’s “done” and we are so happy with how it all turned out! 

I won’t bore you with everything we did, but it was a lot! It’s a completely different backyard now. It’s a useable backyard now. And it’s also a really fun and relaxing backyard now. Raegan can actually run around and be fairly safe, and that was our No. 1 goal. 

I’m so proud of all of the hard work Alex put in, he worked his butt off!

We've really enjoyed the backyard after Raegan goes to bed. Sometimes Alex will light the fire pit, we'll grab blankets and a pillow and lay in the hammock watching something on the laptop. It's pretty awesome to be able to enjoy our yard like that. We've also been grilling up dinner a lot lately, mostly veggies and shrimp or burgers. We're getting a lot of use out of it already!

It makes me excited for more days and nights enjoying our backyard! 

I have some fabric that I'm going to turn into outdoor pillows for our hammock and chairs, I'd like to get some hanging plants and add lighting around the barbecue as some of the finishing touches. I can't wait to share more when all the little details come together! 

Here are a bunch of before and during demo photos: 
We had no grass out back, just a "clump" of random plants and a bunch of brick and cement walkways.
The view from the other side. We extended the retaining wall to the edge of the planter (to the left)


Removed the "clump" and broke up the cement.

We extended the retaining wall and had to fill the pit in with cement and a ton of dirt. 

Preparing drainage and sprinkles for our soon-to-be grass!


Brick area for the barbecue


Just before the grass went in.

And a few more current/after photos:


The view from the barbecue.

Friday, May 2, 2014

Food Friday: Cinco de Mayo Favorite Recipes

We love Mexican food in our house. We probably eat some form of it at least once a week, most likely more. Tacos, enchiladas, burritos, taco salad, quesadillas, margaritas, chips and salsa, guacamole, nachos, carnitas, fajitas ... Mmmm. 

In honor of Cinco de Mayo coming up, if you're looking for some delicious recipes to try, here are a few of my favorites: 

Chipotle Shrimp Tacos: I shared the recipe earlier this month, and they are so simple and full of flavor! 

Oven Tacos [via Mommy? I'm Hungry blog]
Oven Tacos: I found this recipe on Pinterest a while back and they immediately became a favorite. I don't usually make tacos with hard shells, but these are too good not to. It's a great recipe to feed a small group, since you use 2 pounds of meat. I use ground turkey for mine. 

Beergaritas: You can't really go wrong with beer and margaritas, and if I weren't pregnant, I would definitely be having one (or two) of these. The recipe is super simple: 1/2 cup tequila, juice of one lime, 1/2 cup frozen limeade and 2 chilled bottles of Corona Light (we've also tried the mini Coronas and they work well too). Cheers!

Guacamole: I don't use a recipe for making guacamole but have a couple secret ingredients that I think make this dip: minced garlic and hot sauce. I usually smash a couple avocados, add diced tomatoes, a little chopped fresh cilantro, a little diced red onion, one minced garlic clove and lime juice, salt, pepper and hot sauce to taste. 

Kim's Chicken Casserole: Lindsey shared this recipe and it's also a favorite in our house. It's full of tortillas, cheese, chicken and salsa. 

Taco Salad: This salad is so easy and versatile depending on what you like/don't like. When I make it, I usually include romaine and/or iceberg lettuce, chopped tomatoes, black beans, corn kernels, avocado chunks, black olives, shredded cheddar cheese, crunched up tortilla chips, and topped with taco meat, salsa and sour cream. It's also great tostada-style on top of flat flour tortilla and a layer of warm refried beans. 


Homemade Taco Seasoning: I no longer buy the packaged taco seasoning and instead make my own. It works for us since we always have these spices on hand, so I just mix it up as needed. Plus I control how much salt we add, since I sometimes find the packaged seasoning to be too salty. 

And here are a couple recipes that I have yet to try but sound pretty good!

Beer Beef Fajitas: This Sandra Lee recipe for Beer Beef Fajitas sounds so simple and tasty! Plus you just put everything in the crock pot and let it cook. One thing I would do differently in this recipe is grill the bell peppers and onions separately instead of letting them cook with the meat. I like my veggies a little crisper. 

Honey Lime Tequila Shrimp Tacos [via Tartine and Apron Strings blog]
Honey Lime Tequila Shrimp Tacos: These shrimp tacos sound so good! I'm sure all of the flavors of the lime, tequila, honey, chipotle, avocado and shrimp are delicious together, can't wait to give this one a try!

What are your favorite Mexican food recipes?! 

Wednesday, April 30, 2014

Outdoor Living Inspiration & Ideas

I have been thinking a lot about outdoor living lately and how to make our backyard more kid friendly and fun. 

The last couple weeks, Alex and I (mostly Alex) have been busy giving our backyard a makeover! I will be sharing before and after photos soon (we're putting sod in this weekend!) but here's a little peek at some of the progress. 

This was taken during demo, it was a mess!

This was taken almost at the same spot, a couple feet back, and will soon be grass! Such a big change! 

It has been a lot of work but we know it will totally be worth it! Raegan will have a place to play and we will have a place to relax, all summer long! :) 

Since we're in the middle of a backyard makeover, I've been pinning a bunch of ideas and thought it would be fun to share some really fun and beautiful backyards. One of my favorite places for inspiration lately has been Home Depot's Patio Style Challenge. They invite a bunch of bloggers to give their backyard a makeover, with the help of a gift card and patio furniture set. It's fun to see how each blogger transforms their space into something stylish and useable. Here are some of my favorites:
Isn't this structure they built cool? Kind of makes an outdoor room. [via Lesley Graham's makeover]
I also love this table for outdoor storage or a bar area [via Lesley Graham's makeover]
I love Joni from Lay Baby Lay's design, especially these pink and white pillows she created with the help of her kiddos. [Image via Home Depot Patio Style Challenge]

And some inspiration not from the Patio Style Challenge:
I love so many aspects of this space — the planter boxes, overhang, the crisp white cushions — beautiful and classic! [via Style at Home]
I love this bar seating [via HGTV]
I think this built-in barbecue area is such a great use of space [via Eric Olsen Design]

You have to check out the before photos of this backyard, it's an amazing transformation and inspiring! [via The Hand Made Home blog]

Thursday, April 24, 2014

4 Tips to Create a Great Kiddo Space

Now that I have kids I love designing spaces for them. Here are 4 easy tips that might help you when designing kiddo spaces.

1. Go Bold! Kid spaces need to be bright and full of energy to encourage play. That's why they are perfect areas to use more patterns and colors than you might typically use throughout your home. I would still use a fairly neutral wall color, but create a striped or polka dot accent wall using bolder, more intense colors.


2. Create your own artwork. Artwork can be as easy or as difficult as you want to make it. If you don't have the time or resources to create your own artwork, I would recommend purchasing from etsy.com or storenvy.com to get a more personalized feel. Not only is homemade artwork more personal it is also an inexpensive way to dress up you walls. The simplest way to create artwork is by using words and numbers, which can be done on almost any computer program. Here is some artwork I have created.


3. Use multi-purpose furniture. When I was designing Jena's nursery I did not purchase a single thing that served one purpose, even the crib can be turned into a double bed. Besides the crib the only furniture I bought was the table that serves as the changing table. If you can, use your existing furniture, it's cheaper and can be used later in other parts of your home when your kiddo outgrows it. Here are some alternative ideas to think about.
  • Instead of purchasing a specific changing table, use a dresser or a tall table. I purchased a commercial stainless steel table.
  • Instead of purchasing a glider, ask your parents if they have a rocking chair or a wingback chair you could use for a while. I used a chair that was my grandmothers and I get so many compliments on it.


4. Design with yourself in mind. Even though you are creating a kiddo space you will be spending a lot of time in there, so create a space you love. I love spending time in my girls rooms, because they are as much adult as they are kid. If you make the space too childish, you may not enjoy the space as much as you could. I would also not recommend using a theme when designing your kiddo space, one minute they are into it, the next they are not. Keep it classic so you don't have to waist time and money changing it all the time. If you do want to design with a theme, bring it in through the artwork and accessories, which is easily changed.


Friday, April 11, 2014

Food Friday: Chipotle Shrimp Tacos

We eat a lot of Mexican food in our house. Burritos, taco salad, enchiladas, fajitas and tons of tacos, mostly made with either ground turkey or grilled shrimp. 

This recipe is my favorite for shrimp tacos. I'm a sucker for anything chipotle and the combo of shrimp, chipotle and the creaminess of avocado is so good!

These Chipotle Shrimp Tacos are super quick and easy, pretty healthy and very tasty!


The photos don't do these tacos justice, they are much better than they look in the photo!

Chipotle Shrimp Tacos

Ingredients: 
1 1/2 pounds shrimp, peeled and deveined
2 teaspoons chili powder
1 teaspoon sugar
1/2 teaspoon salt
1/2 teaspoon ground cumin
1/4 teaspoon ground chipotle chili powder
Small corn tortillas

Toppings:
Avocado slices
Shredded lettuce
Salsa Verde
*Chipotle Crema (a mix of sour cream, chipotle in adobe sauce chopped into very small pieces, lime juice, salt. I don't follow a recipe, but mix everything to taste.) I have made the tacos with and without this chipotle crema and they taste delicious either way. 

Directions: 
Combine shrimp with seasonings in a bowl and stir until the shrimp is evenly covered. 
In a large nonstick skillet, spray a little Pam (or extra virgin olive oil) and turn to medium-high heat. Add the shrimp mixture and cook until the shrimp is cooked and turns pink. Remove from heat and serve in corn tortillas topped with your favorite toppings!

See, easy right?! Enjoy!

Recipe adapted from a Cooking Light recipe